The following is a direct copy and has been Pasted in for future reference from the People & Place coursework PDF Doc. (pasted in Maroon)
For this exercise you need to start with a set of recently shot images. You can shoot these as part of the exercise, or combine this editing exercise with another. Try to work with a reasonably large set of images, at least 50, all covering the same theme or location. The more images there are, the more your powers of judgement and memory will be stretched. It will work best if there are sequences of images which explore the same subject, trying to improve. Once the images have been downloaded, follow these steps in time sequence:-
Step one – The technical edit
Take out of the set any images that are obviously faulty, such as out of focus or with camera shake or grossly over- or under-exposed. There are two ways of doing this edit. One is to place them in a new folder, the other is to tag them, using whatever marking system is available in your software.
Step two – The selects
Among the remaining images, all technically fine, make an initial selection of the images that satisfy you creatively. If in a sequence there are two or three and you cannot immediately decide which one is best, include all. The selects, once tagged, can be searched for and displayed in their own browser window. This is a temporary display, so the images remain in the same folder as all the others.
Step three – The first selects
Next, work within these selects to choose the several best. These will be your ‘first selects’. Make a brief note for each to explain why you prefer it to those in the larger group. The images left behind are sometimes referred to as ‘second selects’, or just ‘seconds’.
Step four – Group and review
Take a break from the process in order to return to it with a refreshed eye. Using the browser software, put just the first selects together and review your choice. Go back to the other images left out and confirm that you have made your preferred choice.
Step five – A final choice
If you began with at least 50 images, you should have refined your editing selection to several by now. At this point, however, imagine that there is the possibility of just two being selected for publication somewhere. You would, of course, prefer to show more, but this is beyond your control. Choose only two from the first selects, and write down your reasons for choosing them.
Finally, write your conclusions.
– – – – – – – – – – – – – – – – – – – – – – – – – – – – – – – – – – – – – – – – – – – – – – – – – – – – – –
To help answer this question in all its entirety – the question has been broken down and shown below in parts written in italics, just above my pictures and written answers.
Equipment
Camera – Nikon D4
Lens – 24/70 – f2.8
Ancillary Equipment – Studio Lights, Trigger System, Tripod & Various Backgrounds
Method & Approach
For this exercise I took sixty pictures where I decided to use my wife as a model in front of three different backgrounds. My reason for altering the backgrounds is based on the initial part of the question where it asks of the student to “explore the same subject but trying to improve.”
Please see pictures and captions below.
All pictures have been compressed hence there might be a quality reduction when enlarging.
With regards to making choices within Adobe Bridge, I have renamed the coloured label options to something more structured and understanding.
Key
Red – 1 – Out of focus / Poor exposure
Yellow – 2 – Second pass / First selection
Green – 3 – Third pass / Second selection
Blue – 4 – Fourth pass / Consider for editing
Violet – 5 – Edit / Final choice / Selected for print

Picture 1 – Labelling system renamed in Adobe Bridge
Comments – The labelling system in Adobe Bridge allows the user to number and rename each coloured label to their own personal preference. Having done so I now find the labels are self explanatory as to their meaning and function.

Picture 2 – Initial viewing in Adobe Bridge
Comments – This sequence is effectively straight from the camera and opened for viewing in Adobe Bridge, prior to any selection or editing process.
Having finished the shoot for this exercise, my initial and first workflow chore was to plug the cameras memory card into a card reader and open the photos up in Adobe Bridge. I then give the set of images a suitable name and also save them to an external hard disc. Utilising Adobe Bridge for this task means that if you select “Get photos from Camera” from the file menu the whole naming and saving to disk process can be done in one instant. Upon completion I always make a point to see that the images were indeed renamed and most importantly copied across to the designated hard drive, when happy that everything has been successfully executed, the memory card can be removed from the card reader, wiped clean and reformatted within the camera.
Step one – The technical edit
Take out of the set any images that are obviously faulty, such as out of focus or with camera shake or grossly over- or under-exposed. There are two ways of doing this edit. One is to place them in a new folder, the other is to tag them, using whatever marking system is available in your software.

Picture 3 – The technical edit (first pass)
Comments – Shown above is my first pass selection labelled in red. The selection represents the images from the first pass, these images won’t be considered for further editing.
Step two – The selects
Among the remaining images, all technically fine, make an initial selection of the images that satisfy you creatively. If in a sequence there are two or three and you cannot immediately decide which one is best, include all. The selects, once tagged, can be searched for and displayed in their own browser window. This is a temporary display, so the images remain in the same folder as all the others.
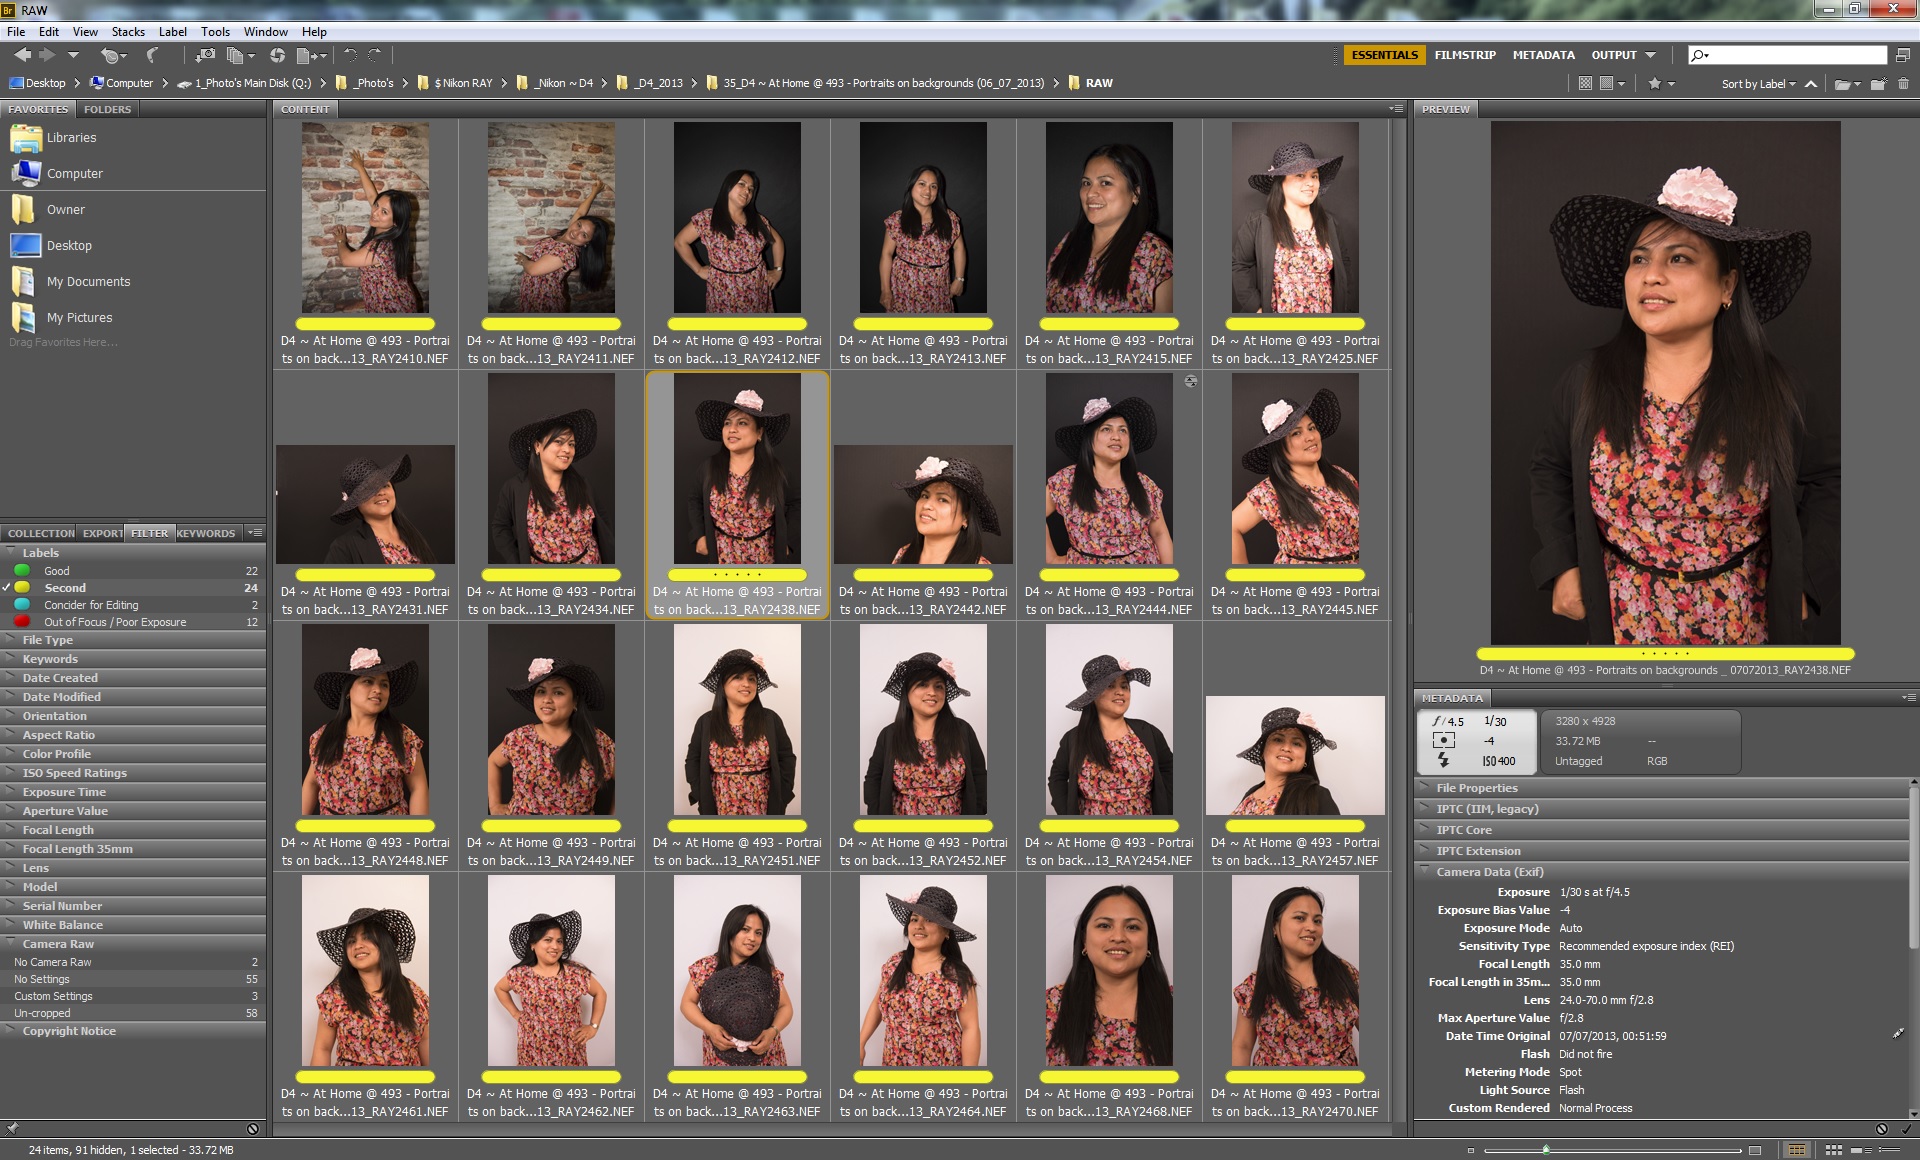
Picture 4 – The selects
Comments – Shown above is my second pass selection labelled in yellow. The selection represents the images from my second pass, these images could be considered for editing.
Step three – The first selects
Next, work within these selects to choose the several best. These will be your ‘first selects’. Make a brief note for each to explain why you prefer it to those in the larger group. The images left behind are sometimes referred to as ‘second selects’, or just ‘seconds’.

Picture 5 – The first selects
Comments – Shown above is my third pass selection labelled in green. The selection represents the images from my third pass, these images could all be considered for further editing.
This sequence has now been considerably reduced showing just the green labelled choice of “good” images (prior to editing).
Step four – Group and review
Take a break from the process in order to return to it with a refreshed eye. Using the browser software, put just the first selects together and review your choice. Go back to the other images left out and confirm that you have made your preferred choice.

Picture 6 – Approved shots
Comments – This sequence shows my last six images which have made it through the selection process.
Step five – A final choice
If you began with at least 50 images, you should have refined your editing selection to several by now. At this point, however, imagine that there is the possibility of just two being selected for publication somewhere. You would, of course, prefer to show more, but this is beyond your control. Choose only two from the first selects, and write down your reasons for choosing them.

Picture 7 – Final Selection for Editing
Comments – Shown here by process of elimination are my two final choices from the shoot, from here I will perform some basic edits to each of them.
Please see the comments below each individual picture for my reasoning and also what influenced me in selecting each picture.
Shown below are my two pictures of choice after some basic edits to the RAW files and a little touching up within Photoshop.

Picture 8 – My first picture of choice
Camera Details
Camera Nikon D4 (Camera positioned on a tripod)
Speed 1/60th sec
Aperture f4.5
ISO 400
White Balance Setting 6150°K
Lens 24/70 – f2.8 lens
Focal Length 50mm
Comments – I chose this picture as my first choice for several reasons, firstly it has a value of cheekiness about it which makes it a little more exiting than the others, I also like the double meaning of is she adjusting the hat or posing for the camera. The mottled effect of the light bleeding through the hat also adds a certain character of difference to the skin which I like but mostly I like the movement in the picture created from the angles of her arms. We can see a diagonal from corner to corner across the picture if we consider her hands as the points but we also have another diagonal from her arm in the right of the picture stretching upwards.

Picture 9 – My second picture of choice
Camera Details
Camera Nikon D4 (Camera positioned on a tripod)
Speed 1/60th sec
Aperture f4.5
ISO 400
White Balance Setting 6150°K
Lens 24/70 – f2.8 lens
Focal Length 45mm
Comments – This image is a little more formal in keeping compared to the one above. What influenced me with this picture again was several things, I like the angle of her head suggesting a quizzical look and also the dynamics of one shoulder lower than the other. Again we see the mottled effect from the hat across her brow but softer. This portrait also differs from the picture above in that the dress she is wearing contrasts more so against the black background.
What have I learnt from this exercise
I have learnt from this exercise that not everything seen on the camera screen looks good. For example, making a quick checks of the histogram and highlights may look good in principal but until viewed at size on the big screen and then going through the selection process, can reveal a very different picture than initially considered at the point of initial capture.
Thoughts and Reflection
Looking at my existing approach and method toward picture choice and final selection has certainly changed forever and having taken the time to learn about the labelling system on offer within Adobe Bridge has introduced a more thorough selection process. As mentioned above at the start of this exercise, I have taken the opportunity to find out how to rename the labels and apply a system that combines a logical elimination process and the common sense derived from my own thoughts.
Summary
Again I have enjoyed this exercise and with it the opportunity to learn and discover new things with in a software based program that have always been there, but unknowingly to me.
With the original image number maintained whilst labelling and also renaming photos, this system offers an independent means outside the onboard camera numbering system and then further allows the user to add personal and constructive comments and even rate a picture by star count. And there’s more, upon editing or later searching the system, it also offers a filter system to help find previous selections with stored comments, its a tremendous logical approach and will continue to use from here on
