The following is a direct copy and has been Pasted in for future reference from the People & Place coursework PDF Doc. (pasted in Maroon)
The aim and structure of this exercise is, as for the previous one, devising a particular workflow for a specific shooting assignment. The difference, however, is that this assignment should be unstructured and open-ended. A possible subject might be street photography, or recording a weekend trip or part of a holiday.
The key elements of this for the workflow are:
1. The number of images is unpredictable, but probably many.
2. It lasts a sufficient amount of time that you would want to consider reviewing and at least partially editing the images during the shoot, rather than waiting until the end.
As before, plan and write the workflow in advance, then assess it later. How well did you anticipate the needs of the various stages, from photography to downloading to selection, saving and editing? Did the practice of undertaking the assignment lead you to any new conclusions about workflow?
As for the previous exercise, combine this with another exercise if this is more convenient for you. Note your experiences in your learning log.
To help answer this question in all its entirety – the question has been broken down and shown below in two parts (written in italics).
– – – – – – – – – – – – – – – – – – – – – – – – – – – – – – – – – – – – – – – – – – – – – – – – – – – – – – –
Equipment
Camera – Nikon D4
Lenses – 70/200 – f2.8 & 200 – f2.0 (prime)
Ancillary Equipment – Monopod
Method & Approach
Please see pictures and captions below.
All pictures have been compressed hence there might be a quality reduction when enlarging.
Proposed time for shoot – Two hours.
My equipment list
Again I used my trusty workflow and photography equipment list for this exercise, as seen in the previous exercise and in this instance my equipment consisted of the following items.
I. List several known locations that will suit this exercise – Witney funfair (see below for more details about this venue.
II. Upon decision my means of transport to destination – Personal car
III. Choice of camera – Nikon D4 camera
IV. Choice of Lenses – 70/200 – f2.8 & 200 – f2.0 (prime)
V. Choice of optional equipment – Lightmeter, X-rite colour checker passport, Monopod, Black rapid strap, Spare camera battery, Suitable bag.
Location – Witney funfair
- Being that Witney is my home town I have been to this annual event on countless occasions, but due to the event not being permanently setup, it lends itself to each year being slightly different. The rides are often in different parts of the playing field and some rides are new additions to the fair. It is locally called the Witney Feast and marks the Annual Feast of St Mary which has been held since 1243 to commemorate the re-dedication of St Mary’s Church. Apparently history claims that the Bishop gave a deer to the Rector so the people of the town could celebrate the occasion. Today in commemoration a pig roast is held on the Church Green which still marks this part of the tradition alongside the fairground.
Other considerations
- I checked the weather forecast on the morning and later that afternoon before the shoot, as this venue has a regular habit of raining the event into a slippery and quagmired field.
- I also packed a fleecy top incase the weather suddenly changed, but I left it in the car as the weather was glorious.
- I could have packed more items such as extra memory but in this instance it was not necessary. The camera I use has two card slots and the combined storage capacity is 96Gb, more than enough memory capacity for this shoot.
1. The number of images is unpredictable, but probably many.
Image sequence (First Session – daytime)
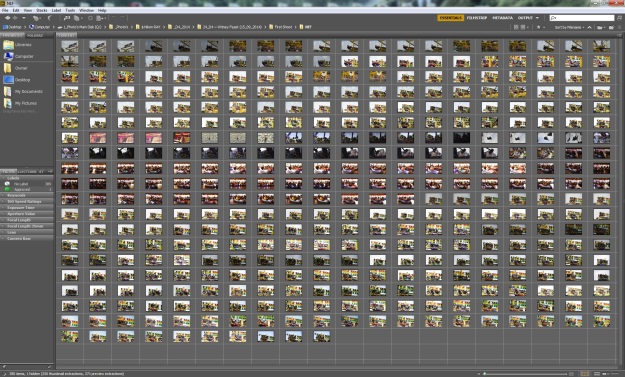
This was my first sequence of pictures taken at the funfair (during daytime). Shown below in picture one, we can see the complete session shot as a picture sequence, this is also prior to any selections or edits made.
Picture 1 – Straight from the camera (first session)
Comments – The portrait sequence shown above has been copied across from the cameras memory card and then opened up using Adobe Bridge. These pictures are effectively straight from the camera.
Personal choice & creative judgement
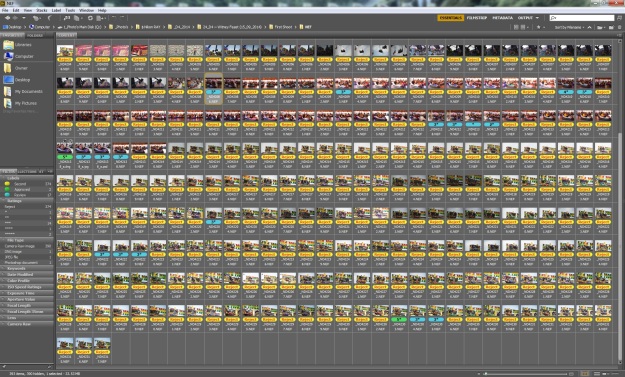
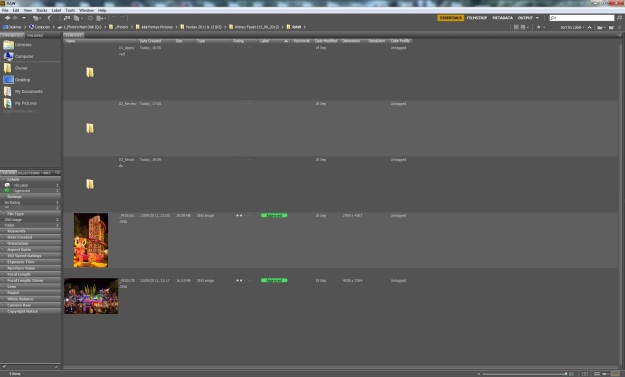
Shown below is a screen dump of Adobe Bridge where we can see my selection and choice of images I have labelled.
Picture 2 – Marked up viewing of session (first session)
Comments – The portrait sequence shown above has been marked up accordingly, from viewing each one on a large computer screen. See below for colour details.
- Yellow – Rejects
- Blue – Review
- Green – Approved
With this exercise my choice of location was the local funfair and here I wanted to capture peoples faces and their emotions of joy, laughter or to some extent fear. My picture rejection was based upon facial energy, excitement and expression. Capturing images like this was challenging and difficult at times due to the crowds, also challenging was the different style of rides and the constantly varying speeds of the carts and trains. In the process some of the pictures were captured slightly out of focus hence a rejection process in parallel to the above took place here too.
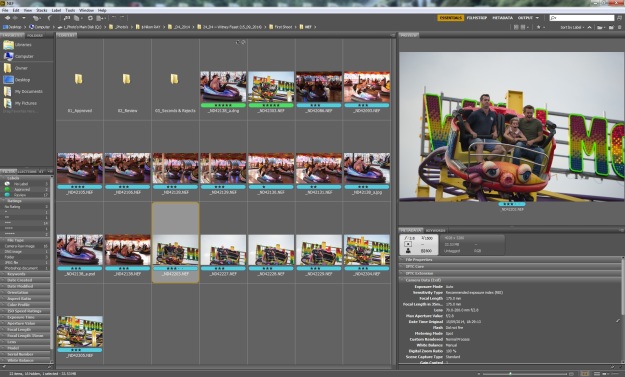
Picture 3 – Pre-approved & reviewed shots (first session)
Comments – The sequence has now been considerably reduced showing just my selection of pictures I want to further Review and also the images that I have Pre-approved (prior to editing).
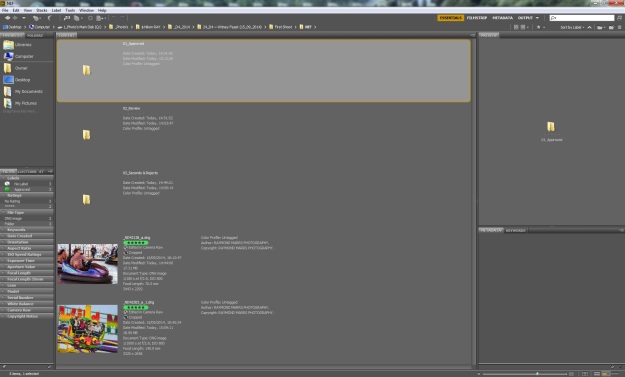
Picture 4 – Final selection for editing (first session)
Comments – Shown here are my final choices from the shoot. I will now take these two pictures and edit them.
Editing the final image(s)
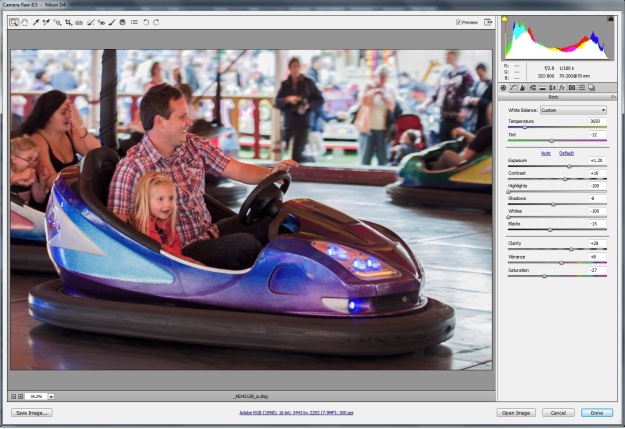
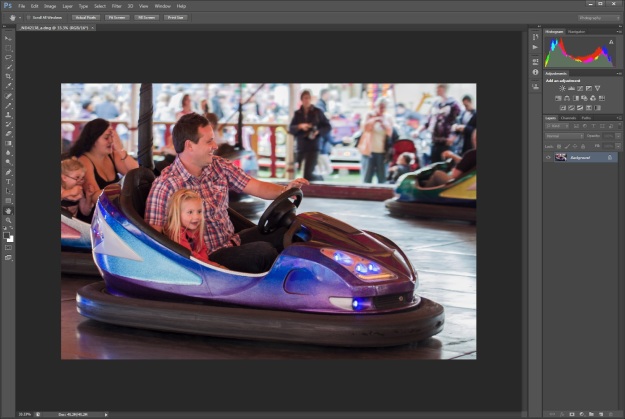
I have made some basic edits to the RAW files in Adobe RAW, upon opening the file I select the camera calibration tool and then my calibrated profile for that particular camera. This is obtained by using the X-rite colour checker passport and then within the X-rite software (separate to Adobe) you create and then save the date which then appears as a profile in Adobe RAW. This process accurately colour matches the RAW file to true designated colours given from an un-edited picture taken on the day of the passport. In general I have increased the exposure slightly, added some sharpening and cropped the images for an improvement on framing.
Please see the screen dump / captured images below.
Picture 5 – Editing the RAW image (first session)
Comments – Shown above is a screen dump of Adobe’s RAW editor. This workflow process is performed on the initial RAW image file and takes place before the image is opened in Photoshop.
Picture 6 – Editing the image in Photoshop (first session)
Comments – Having made the initial edits in the Adobe RAW environment the image is then opened into Photoshop, shown above is a basic screen dump of the Photoshop environment.
Processing the final image(s)
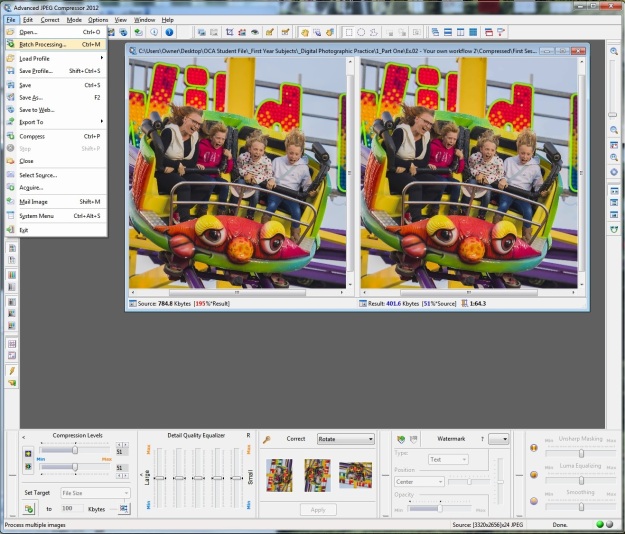
Compressing the images.
Picture 7 – Compressing images for my blog site (first session)
Comments – In order to maintain space for future exercises, I routinely compress my final images to approximately 800KB. Shown here is a process not mentioned in the previous exercise (workflow 1) but for the record I decided to include it here, as after all it is a workflow process – used in conjunction with my blog and coursework needs. Upon finishing all my editing within Photoshop, I create a final Jpeg image which I then compress using a software package called Advanced Jpeg Compressor and it is here where I also add my name and student number to the final compressed image(s). At this point and from here on my ‘coursework’ workflow for image processing ends and I am now ready to post the image(s) onto my blog site.
2. It lasts a sufficient amount of time that you would want to consider reviewing and at least partially editing the images during the shoot, rather than waiting until the end.
Effectively this part of the question has already been answered with the above processing and workflow having taken place halfway through (session one) but with relevance to this exercise being open ended, I decided to undertake a second session. This time I wanted to capture more of the atmosphere of the fair but under totally different lighting conditions … at night time.
Image sequence (Second Session – Night time)
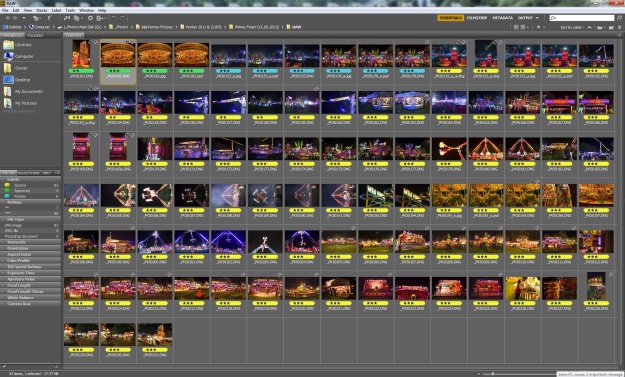
This is my second sequence of pictures taken at the funfair and shown below in picture ten is the complete session as a picture sequence. Although I have performed all the workflow tasks again in session two, I feel it is not necessary to repetitively show all the stages as I have already indicated these processes above in session one.
Picture 10 – Straight from the camera (second session)
Comments – The portrait sequence shown above has been copied across from the cameras memory card and then opened up using Adobe Bridge. Once again these pictures are effectively straight from the camera.
Picture 11 – Final selection for editing (second session)
Comments – Shown here are my final choices from the shoot. I will now take these two pictures and edit them.
Chosen images
Shown below are my pictures of choice from sessions one.
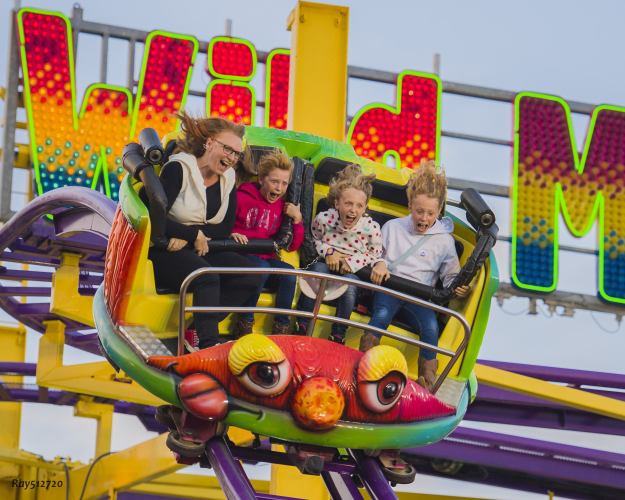
Picture 12 – My first picture of choice (first session)
Camera Details
Camera Nikon D4 (Camera positioned on a monopod)
Speed 1/1000th sec
Aperture f2.8
ISO 800
White Balance Setting 5300°K (custom)
Lens 70/200 – f2.8 lens
Focal Length 140mm
Comments – I have chosen this as my first picture of choice as I love the look of absolute terror on these young girls faces, I don’t know whether their mum is laughing at her children’s screams or its her own nervous excitement kicking in. Somehow the word funfair and faces like these don’t sit together unless of course we are talking of the ghost train or the house of horrors, etc! Analysing this picture we can see so much energy in the girls faces and with the movement of their hair create an image of great amusement.
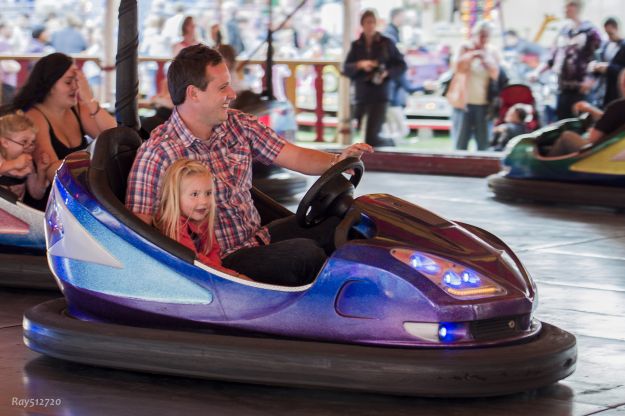
Picture 13 – My second picture of choice (first session)
Camera Details
Camera Nikon D4 (Camera handheld)
Speed 1/180th sec
Aperture f2.8
ISO 800
White Balance Setting 3650°K (custom)
Lens 70/200 – f2.8 lens
Focal Length 70mm
Comments – In this image we see a different kind of facial energy with a different kind of body language too. Apart from the blue dodgem car in the foreground the main characters are the man driving with his daughter tucked under his arm for her security, in both their faces we see a more confident look of excitement, where as in the picture above the cart on the track is controlling the people here we see the people controlling the car (a reverse scenario) hence a calmer and more relaxed look in the faces. We still see plenty of excitement and energy, we only have to look at his daughters eyes and facial expression for proof.
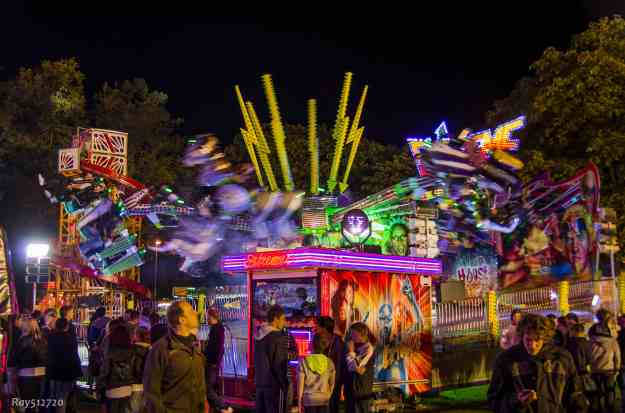
Picture 14 – My first picture of choice (second session)
Camera Details
Camera Nikon D4 (Camera positioned on a monopod)
Speed 1/60th sec
Aperture f2.8
ISO 800
White Balance Setting 6200°K (custom)
Lens 24/70 – f2.8 lens
Focal Length 50mm
Comments – This image shows a busy ride in motion and various people gathered in various groups all talking and socialising. We can see a man in the central left of the picture somewhat concerned looking for somebody, perhaps his son or partner and to the very far right corner another male walking towards the camera acknowledging his phone. The motion blur of the ride, the vibrant painted figures and the coloured lights against the contrasting black of the night all add energy, making this a very busy picture.
Picture 15 – My second picture of choice (second session)
Camera Details
Camera Nikon D4 (Camera positioned on a monopod)
Speed 1/60th sec
Aperture f2.8
ISO 800
White Balance Setting 7000°K (custom)
Lens 24/70 – f2.8 lens
Focal Length 24mm
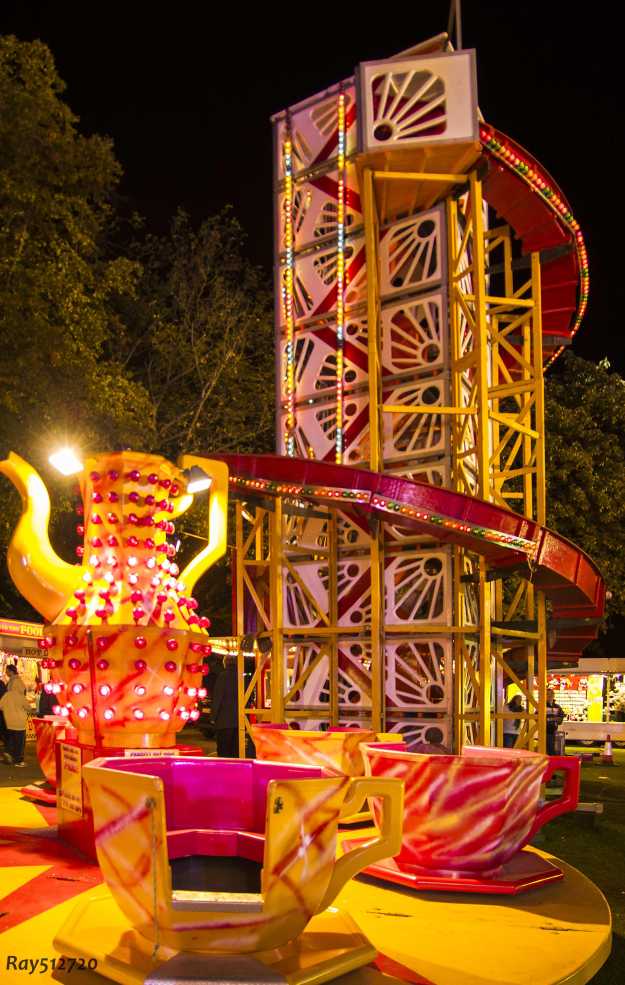
Comments – In this image I wanted to show a complete opposite to the above pictures, here we can see a calmer picture devoid of any people, no expressions, screams or crowds. Although this picture visually contains no characters in the foreground, it still carries that fair ground energy of brightly coloured coachwork and contrasting electric lights against the night time atmosphere.
What have I learnt from this exercise
Again I have learnt from this exercise that it pays to be organised. Before I set out on this shoot I had done my homework by utilising my laminated checklist (workflow routine). All preparation takes time and knowing that the fair was in town, I had already made my equipment list in my head before ticking it off my list. With regards to performing edits halfway through the session gave me a greater idea of what I wanted to capture from the second session, especially under different light conditions. I could have taken the exact same pictures as earlier (but for the people) and without consulting my thoughts halfway through I probably would have and they would have been fine. But due to the opportunity of seeing the pictures half way through the shoot gave me pause for thought, just repeating what I had taken earlier would be too easy, too safe, and possibly introduce a shallower outcome of pictures upon the whole shoot.
Thoughts and Reflection
I have learnt to take more advantage of a shoot by taking a break and consider what is currently on the memory stick. To take a quick look and perhaps perform a basic edit of some images, get a feel for what is on offer from the shoot, are they all bad, are some very good or do I need to concentrate on better subject focusing? With all this going on put down some notes and think differently in what could be added to the session to give more interest and produce a more varied set of images.
This does add time to a shoot and also to the workflow pattern (doubling up some tasks from previous) but at the end of the day it’s the pictures that matter. If taking a break has lent opportunity to look and partially study the pictures it could be that a re-shoot is necessary, meaning there is still possibly an opportunity. This makes real sense compared to exhausting the whole day shooting, I might capture more images throughout the whole day but at the same time fail to see my mistakes that can only be picked up on a larger screen. If it’s an event where there are particular timed events crucial to the shoot, these would have to be scheduled into the day either side of the break.
Summary
I have enjoyed this exercise, and with it the opportunity to discover a new way of working whilst out with my photography equipment. I read a lot of magazines but I have never read or picked up from reading editorials articles to take opportunity through the current shoot and view images on a larger screen and perhaps edit one or two images to see how things are currently looking. I must admit, I am more prone to pick up a magazine that focuses on new photography products rather than ‘workflow’ … which I now recognise and will therefore change my future outlook.
