The following is a direct copy and has been Pasted in for future reference from the People & Place coursework PDF Doc. (pasted in Maroon)
Devise and then put into practice a workflow that suits you personally for a specific short assignment, and make notes of your experience of this in your learning log.
Make this a portrait session, which will be limited in time. For this, you will need to scout a suitable location that provides an attractive or unobtrusive setting, then consider different poses for your subject, perhaps varying the scale from head-and-shoulders out to three-quarter length or full length.
The important thing from the point of view of the workflow is that you will be taking a number of images, all in a concentrated period of time, which will then need to be edited in order to select one or two.
The editing, or selection process, will happen later, when you examine the entire take on the computer, and then you will be looking for the best expression, pose and whatever variations you made in camera position and focal length. The assignment, therefore, will contain the following elements:
I. Time-limited shoot
II. On-the-spot development and improvement of composition
III. A sequence of images, possibly 20 or more, in which you are searching for an improvement in the way the subject appears (notably pose and facial expression)
IV. A separate session of picture selection, exercising creative judgement
V. Processing the finally selected image(s) Plan the workflow in advance, and write it down as a kind of flow chart. Follow this workflow for the assignment, but be prepared to depart from it if you find it restrictive or if you decide, as you work, that it has shortcomings. If you like, you can combine this exercise with another in the course- in other words, use another exercise as the assignment around which to construct and practise a workflow.
Note – To help answer this question in all its entirety – the question has been broken down and shown below (written in italics).
– – – – – – – – – – – – – – – – – – – – – – – – – – – – – – – – – – – – – – – – – – – – – – – – – –
Equipment
Camera – Nikon D4
Lenses – 24/70 – f2.8 & 70/200 – f2.8
Ancillary Equipment – Tripod & Remote Trigger
Method & Approach
Please see pictures and captions below.
All pictures have been compressed hence there might be a quality reduction when enlarging.
Please note – This exercise has been performed in tandem with another of my Photography coursework exercises (People & Place_Exercise 07).
I. Time-limited shoot
Proposed time for shoot forty minutes.
Rousham Gardens (my choice of location)
I have been to this location many times and I knew just the place within the gardens that I wanted for this exercise. Its not a national trust site (you have to pay to enter) and the school children had just returned to school, hopefully meaning that it would be even quieter than normal and for me to set up for forty minutes without too much disturbance, not to mention it’s only half an hours drive from where I live.
II. On-the-spot development and improvement of composition
With regards to question, my choice of development and improvement of composition was to firstly change the lens from a 24/70 to a 70/200. Moving the camera and tripod setup farther back improved the subjects freedom as I was no longer as close and in turn this also relaxed the mood of the shoot. The lens change also created a more natural looking image as the 24/70 has a slight tendency to distort the image at the lower end of the focal spectrum.
More so for composition, I directed the subject to stand for a few of the shoots but she didn’t look as comfortable as when sitting, we also tried some pictures with my wife wearing her sunglasses to try and present a different look but I didn’t like this either, it took her identity away and for me one of her best features is her eyes.
III. A sequence of images, possibly 20 or more, in which you are searching for an improvement in the way the subject appears (notably pose and facial expression)
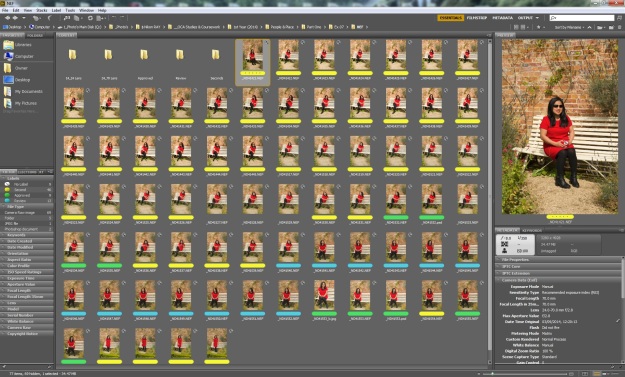
- Please see the picture sequence below, in this sequence we can see the complete shoot prior to any selections or edits made.
Picture 1 – Straight from the camera
Comments – The portrait sequence shown above has been copied across from the cameras memory card and then opened up using Adobe Bridge. These pictures are effectively straight from the camera.
IV. A separate session of picture selection, exercising creative judgement
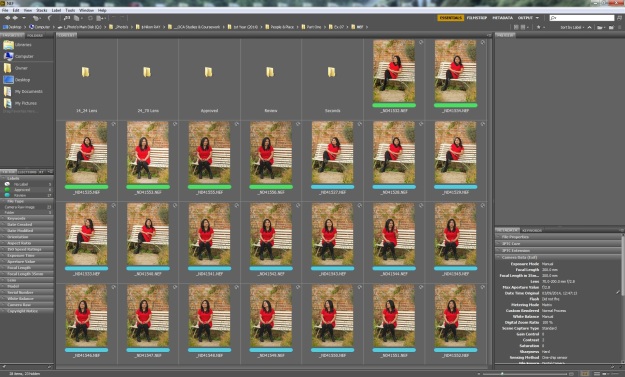
Shown below is a screen dump of Adobe Bridge where we can see the selection and choice of images I have labelled. You can also see in the screen dump (top left) a series of folders where I will and have partially moved some of the pictures.
Picture 2 – Marked up viewing of session
Comments – The portrait sequence shown above has been marked up accordingly, from viewing each one on a large computer screen. See below for colour details.
- Yellow – Seconds
- Blue – Review
- Green – Approved
My rejection for some of the pictures was based upon my wife wearing sunglasses, it hides the eyes and removes the personality from the persons face and directional gaze, I also didn’t like the standing pictures as the subject looked slightly uncomfortable in this pose during this shoot.
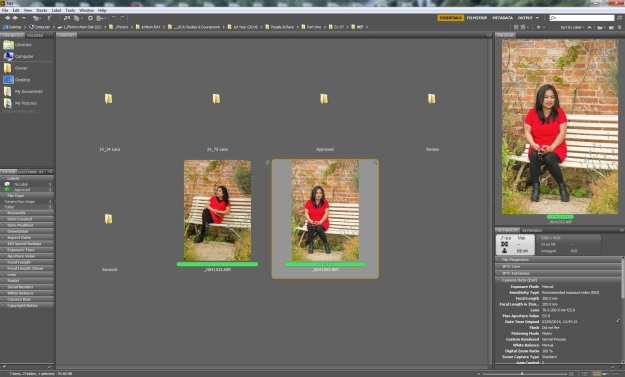
Picture 3 – Basic approved & reviewed shots
Comments – The sequence has now been considerably reduced, showing just my choice of Seconds and Approved (prior to editing).
Picture 4 – Approved shots
Comments – this sequence shows four images which have made it through my personal selection process.
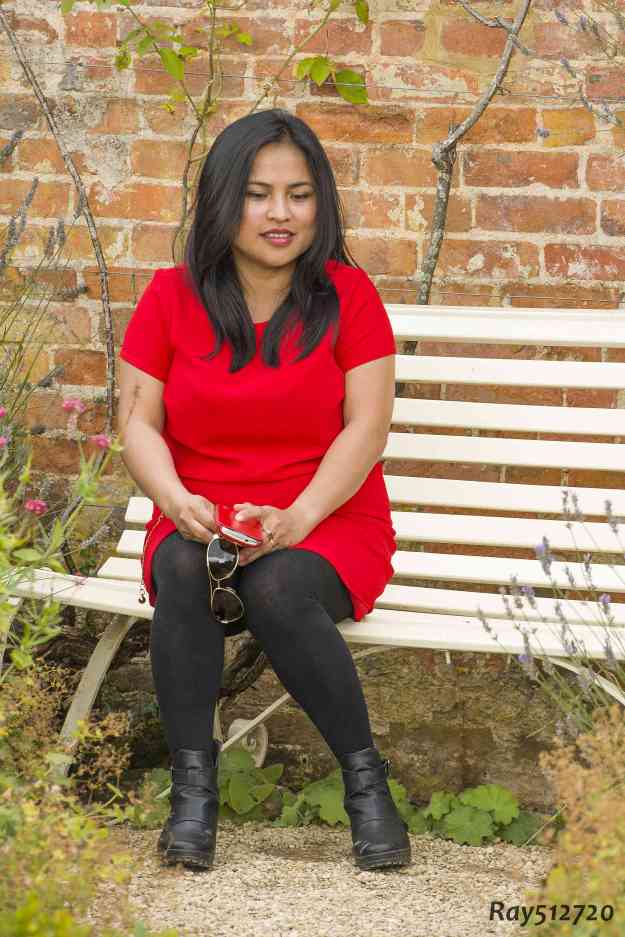
Picture 5 – Final selection for editing
Comments – Shown here are my final choices from the shoot. I will now take these two pictures and edit them.
V. Processing the finally selected image(s) Plan the workflow in advance, and write it down as a kind of flow chart. Follow this workflow for the assignment, but be prepared to depart from it if you find it restrictive or if you decide, as you work, that it has shortcomings.
With relevance to the above question, I have interpreted it as two questions in one, therefore I have answered it as two separate questions.
Vi. Processing the final image(s)
Shown below are my two pictures of choice.
I have made some basic edits to the RAW files in Adobe RAW, upon opening the file I select the camera calibration tool and then my calibrated profile for that particular camera. This is obtained by using the X-rite colour checker passport and then within the X-rite software (separate to Adobe) you create and then save the date which then appears as a profile in Adobe RAW. This process accurately colour matches the RAW file to true designated colours given from an un-edited picture taken on the day of the passport. I have also slightly increased the exposure and finally in Photoshop, I cropped the images for an improvement on framing and then added a little sharpening.
Please see below for my two pictures of choice.
Picture 6 – My first picture of choice
Camera Details
Camera Nikon D4 (Camera positioned on a tripod)
Speed 1/60th sec
Aperture f8.0
ISO 100
White Balance Setting 5500°K
Lens 70/200 – f2.8 lens
Focal Length 200mm
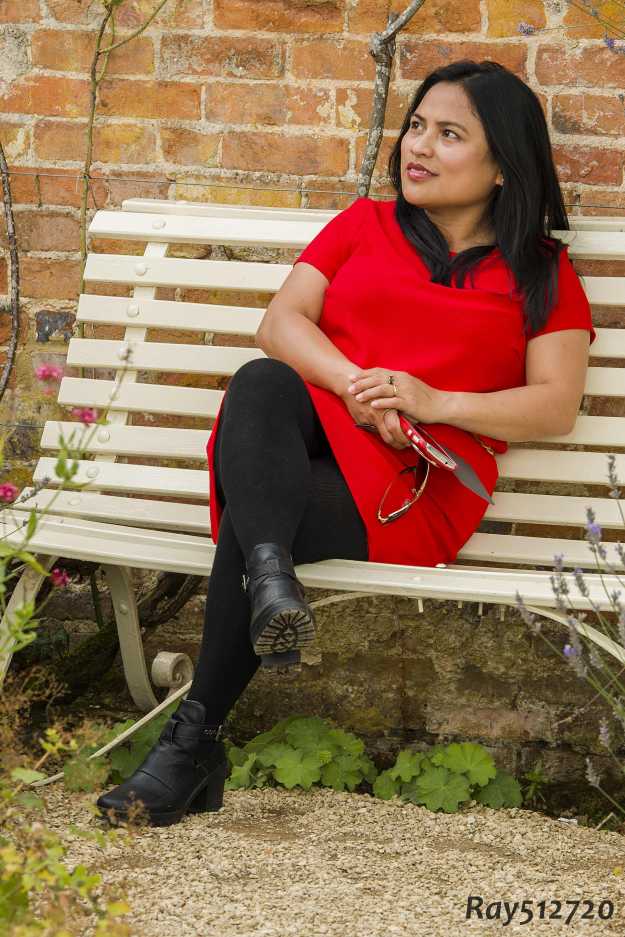
Comments – I have chosen this as my first picture of choice as I like the captured candid look and the innocence of her body language. With the subjects head position not looking directly at the camera and her eyes looking towards the gravel it has created a picture characteristic where the viewer naturally follows the direction of her gaze. The body language of this picture can be taken further by looking at her arms positioned in an embraced like fashion, and also her mouth slightly open with a very slight smile introduces a friendliness to this portrait.
Picture 7 – My second picture of choice
Camera Details
Camera Nikon D4 (Camera positioned on a tripod)
Speed 1/60th sec
Aperture f8.0
ISO 100
White Balance Setting 5500°K
Lens 70/200 – f2.8 lens
Focal Length 200mm
Comments – In this image we see a different sitting posture from above. This position shows a body posture taking advantage from the comfort of the chair, her legs are crossed in a ladylike gesture and her arms are naturally placed. The shoulders and torso position are angled towards the camera in a more engaging way with the viewer, whilst her head tilted upwards and her gaze once again looking away creates an interest outside of the picture frame. Even more interest can be brought into this portrait when we introduce the curiosity of ‘why’ is she looking in that direction with her mouth partially smiling, it does suggest she is amused at something outside of the frame which is perhaps about to create a humorous situation.
Vii. Plan the workflow in advance, and write it down as a kind of flow chart. Follow this workflow for the assignment, but be prepared to depart from it if you find it restrictive or if you decide, as you work, that it has shortcomings.
In relevance to this part of the question, I always refer to a checklist of my own that I set up a few years ago. With respect to this question, the check list is a saved document on my computer which has been modified several times over the years.
I have a copy on my study notice wall and also one in my regular kit bag that I use the most which has also been laminated.
Picture 8 – My Personal Checklist
Comments – I use this personal list religiously when ever I am preparing for a shoot.
My equipment list
For this exercise my workflow and photography equipment list consisted of the following items.
List several known locations that will suit this exercise – Westonbirt Arboretum, Rousham Gardens, Batsford Arboretum, Hidcote Gardens, Buscot Gardens.
Upon decision my means of transport to destination – Personal car.
Choice of camera – Nikon D4 camera
Choice of Lenses – 24/70 – f2.8 & 70 / 200 – f2.8
Choice of optional equipment – Lightmeter, X-rite colour checker passport, Tripod, Remote trigger system, Spare camera battery, Suitable bag.
Other considerations
- I checked the weather forecast a few days before the shoot.
- I packed a fleecy top and waterproof coat (for both me and my wife) – incase the weather suddenly changed.
I could have packed more items such as extra memory cards and a grey card (for white balance) but in this instance it was not necessary.
- a) There is sufficient memory capacity in the camera and it also has two slots, more than necessary for this shoot.
- b) The grey card (used for white balance) since changing to Nikon, I very rarely use this piece of kit. I find that setting my white balance to one of the preset conditions works very well, alternatively I set the camera to Kelvin and use a daylight setting of 5500 degrees. There is also the ability to amend this setting later on with the RAW editor.
What have I learnt from this exercise
I have learnt from this exercise it pays to be organised, a structured checklist or workflow routine takes time initially but the more it is exercised as a required function prior a shoot, the easier it becomes. My own method is to work from a pre-listed laminated chart (shown above in picture 1) that I tick off and wipe clean at the end, ready for the next session and shoot.
Thoughts and Reflection
The workflow routine is something of a varied and ever changing animal, over the years it will change again and again, as new processes are introduced to the digital world. In my instance adding new equipment introduces a change to my current workflow template.
Having a set routine and workflow that is abided to also makes life much easier if a change of circumstance is introduced whilst on location, it could be anything from weather change, a flat battery or a need to find a different location. Famous last words here would be “just be prepared”
Summary
Again I have enjoyed this exercise and with it the opportunity to discuss and share my approach to the way I work. We all differ in our personal tastes and choice of photographic equipment but we all share a common need to work efficiently and logically.

